Lewis skull: fourth print

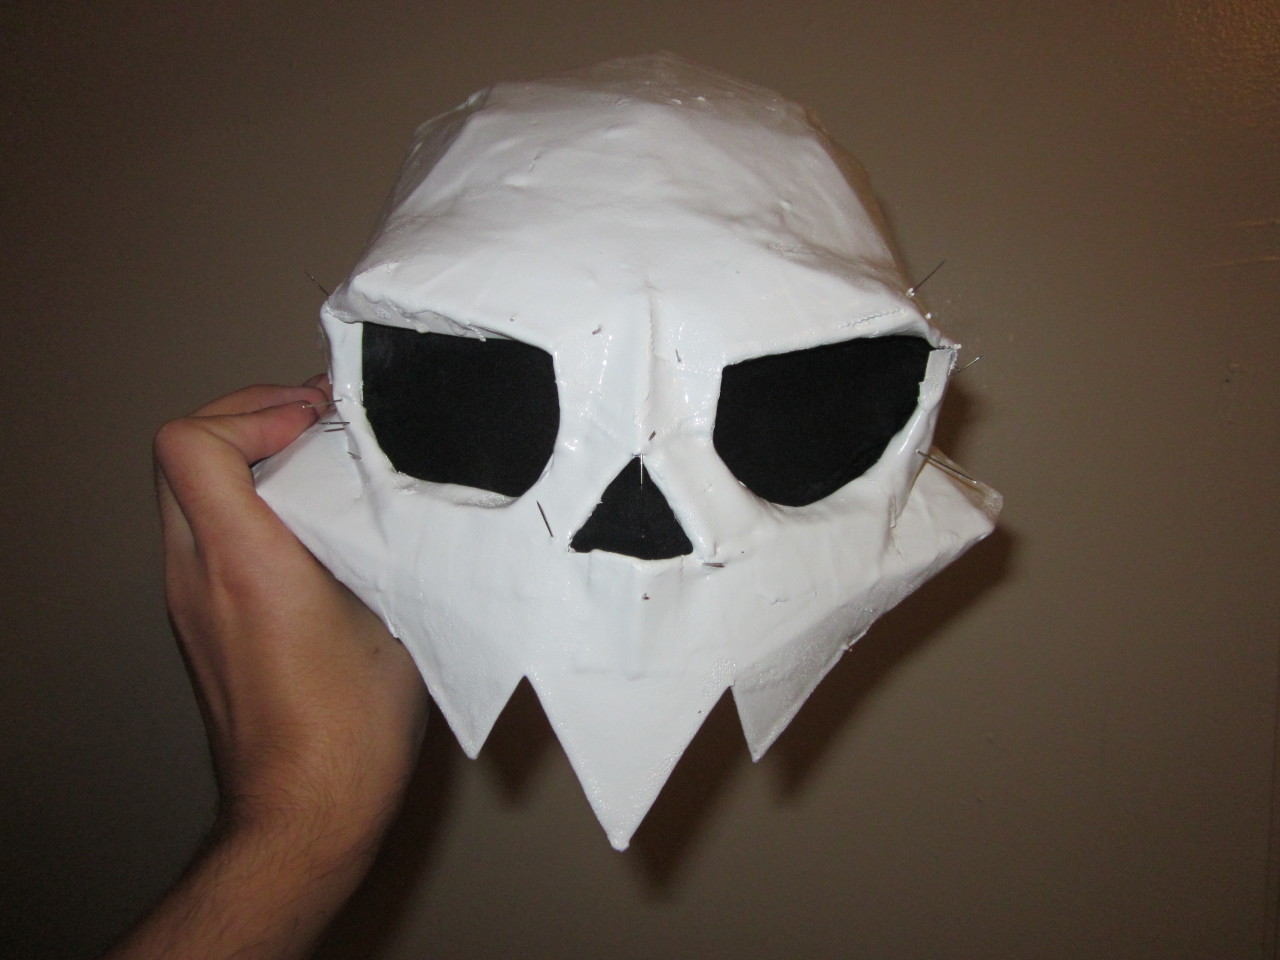
The final print, which was painted and worn.

Published

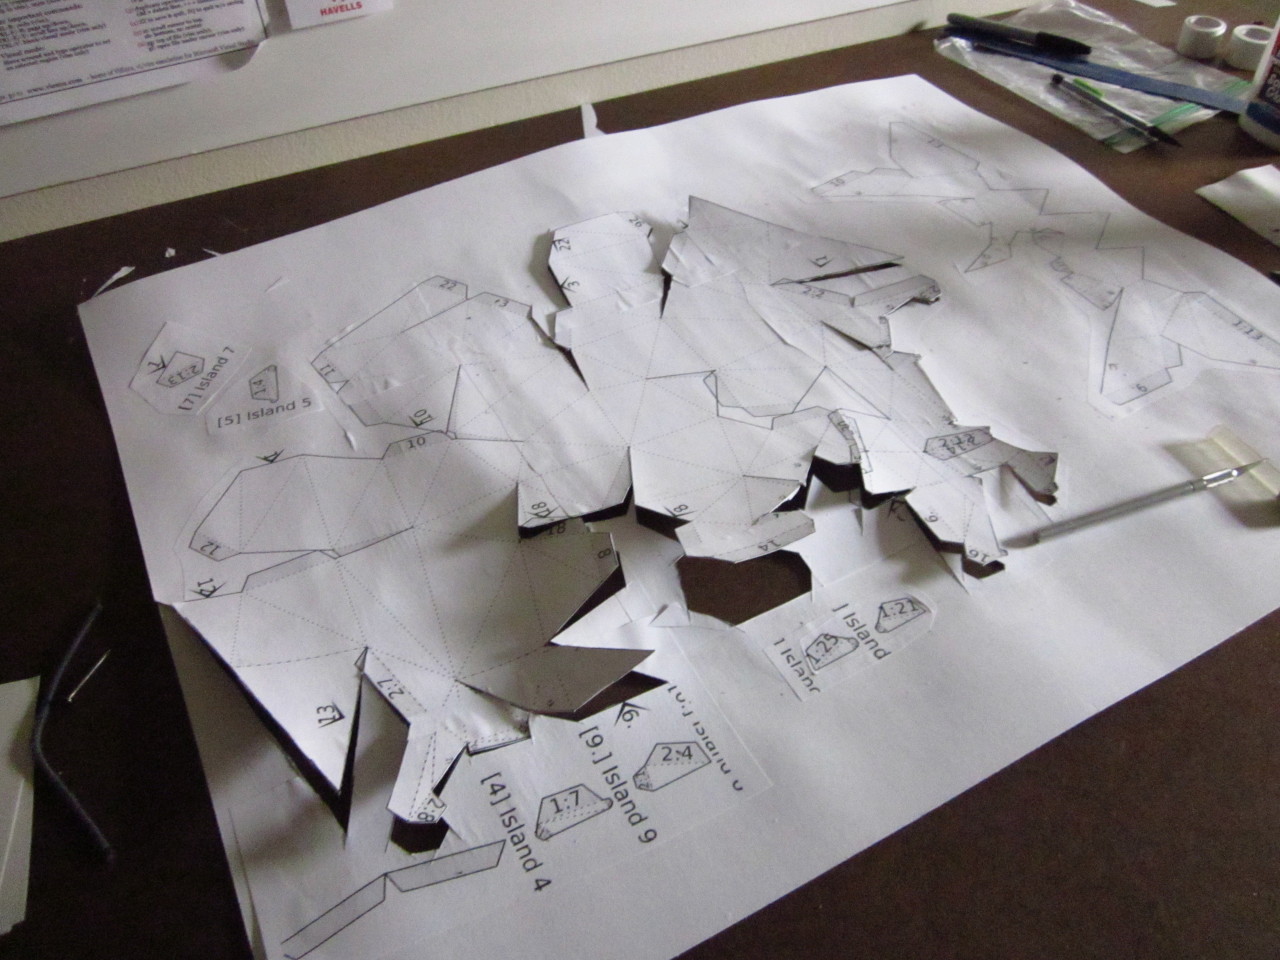
Following on the heels of the second print, which was fist-sized, I scaled the print size up some more.

A sheet of posterboard lies on a brown surface, surrounded by implements of cutting. Jagged lines are cut in its wrinkled surface, and part of it peels up away from the brown.
The fourth skull printed on paper, this time I glued it directly to the posterboard with only the most-cursory of trimming. The glue used is white Elmer's glue.
A papercraft skull sits on a brown desk, surrounded by rulers, scissors, knives, and tape. It is lit dramatically from one edge, and the face is shaped but not yet finally attached to the crown of the skull.
The skull takes shape. I used a lot of medical tape in the construction of this skull to hold seams together. It's very sticky, but its distinctive sawtooth edges take a lot of paint to cover up.
A very blurry close-up of the eye socket of the skull.
The eye hole comes with four more triangles per side that need to be glued on, but I filled in those gaps with creative applications of tape.
The skull sits on an asphalt surface, surrounded by wet leaves. The skull and surrounding pavement are all blasted white with spraypaint.
Painting painting painting. This skull took up several cans of spraypaint. It would have taken longer, but been cheaper, to paint it with a brush. Lacking in spraybooths, I painted outdoors in the parking lot. When rain forced the skull inside to dry, I left it in the bathroom with the exhaust fan on.
Against a blurry background, a black figure in a white collared shirt and pink tie wears the skull. If it had eyes, it would be looking at you.
A test wear, with the skull worn over a black zentai. The tie was sourced from Amazon.
The inside of the skull, showing the eye and nose holes covered by black fabric pinned in place with colorful sewing pins.

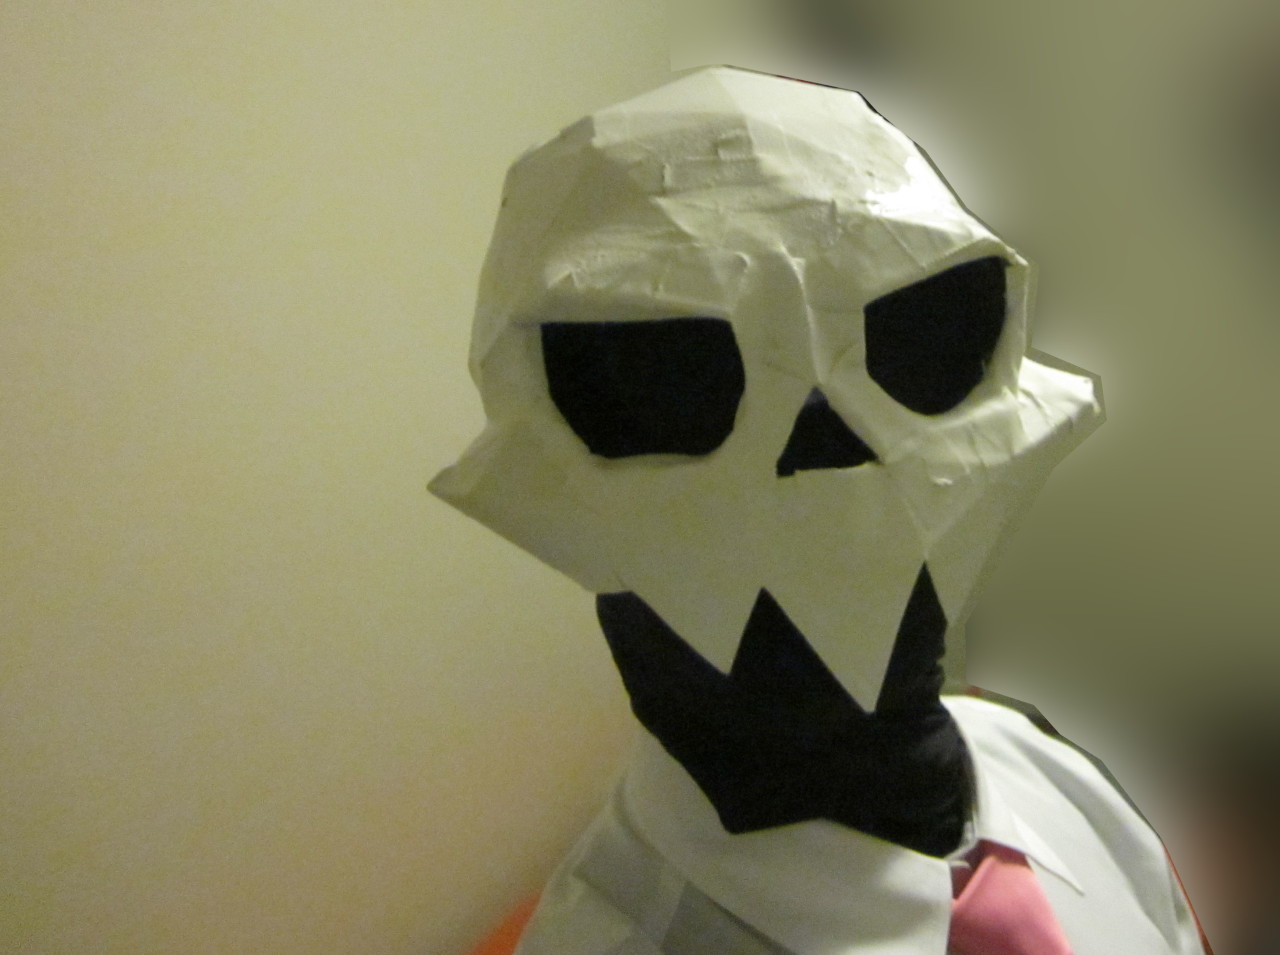
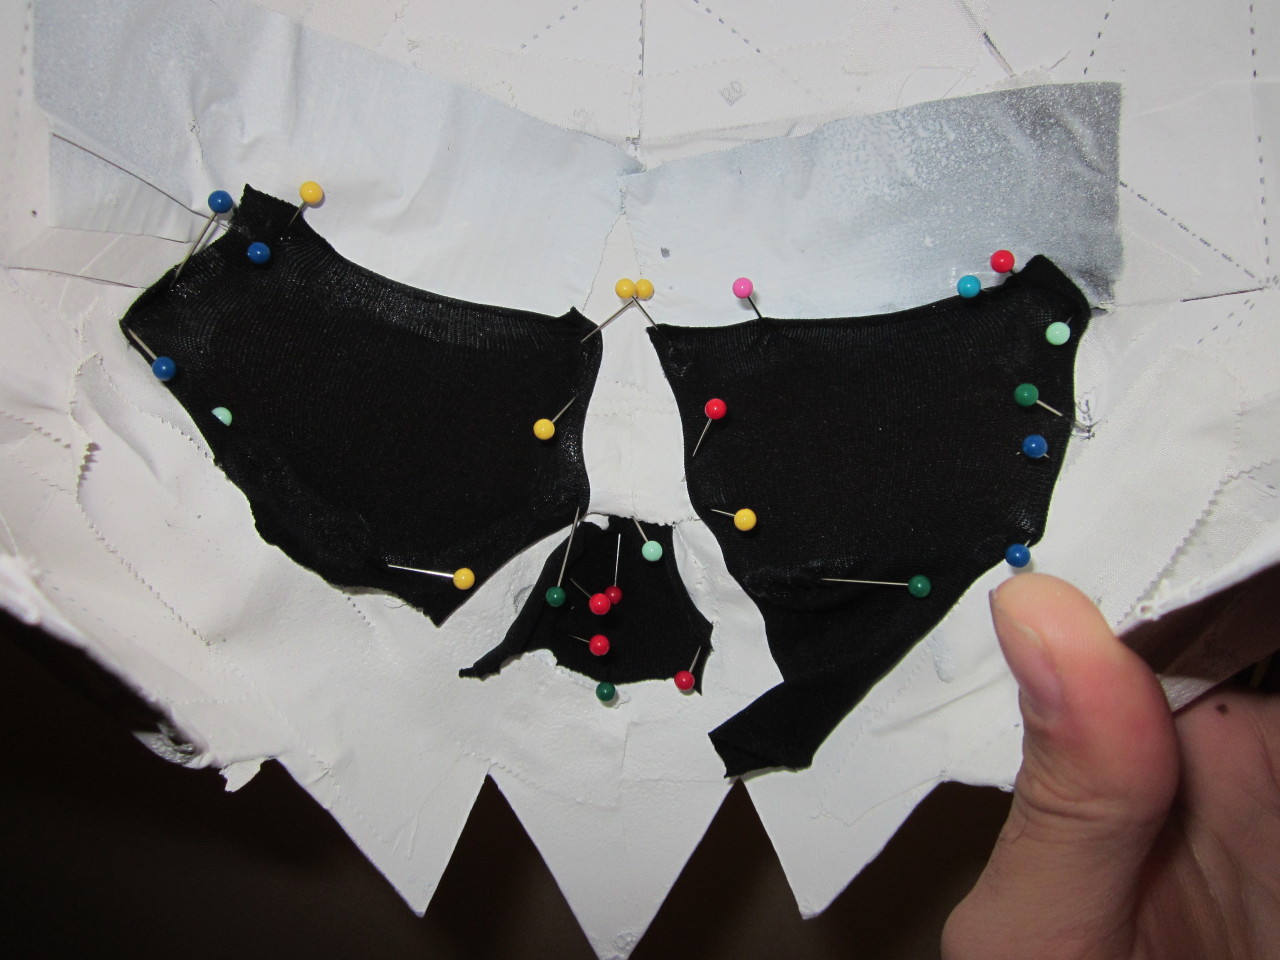
Not wanting to wear a zentai under my clothing all of the time, I found other ways to darken the skull's eyesockets. Goodwill sold cheap black tights during the Halloween season of this year, so I picked up and disassembled a pair.

To hold the tights' black gauze in place, I liberally applied sewing pins.

Glue choice was much more difficult. Super glue is expensive, dries quickly, and doesn't form an effective bond between fabric and spraypaint. Cyanoacrylate emits noxious fumes as it dries, and you don't want those fumes anywhere near your eyes. Don't apply superglue to a project within 24 hours before you'll wear it. I finished off the gluing with Gorilla Glue.

Those pins poke out of the front of the mask.
Of course, pushing all those pins through the skull did have side effects: the face of the mask became painfully spiky and required careful handling until the glue dried.
Three heaps of paper and one completed skull sit on a wooden table.

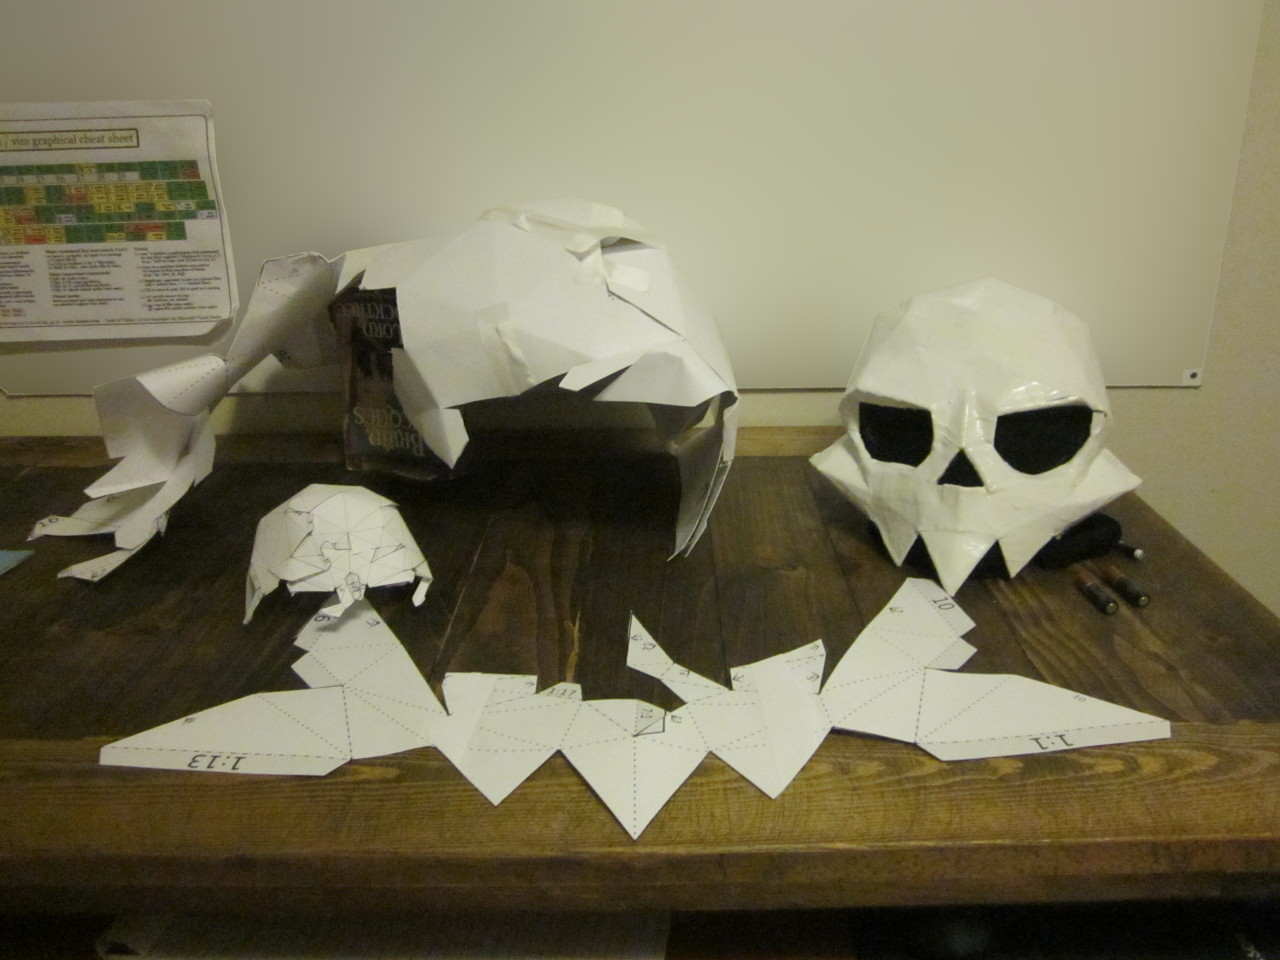
The completed trio of skulls.

In front of the skulls is the face plate of Skull 3. It’s more than two feet across. The same pattern of Skull 4 was only eighteen inches across, or so.