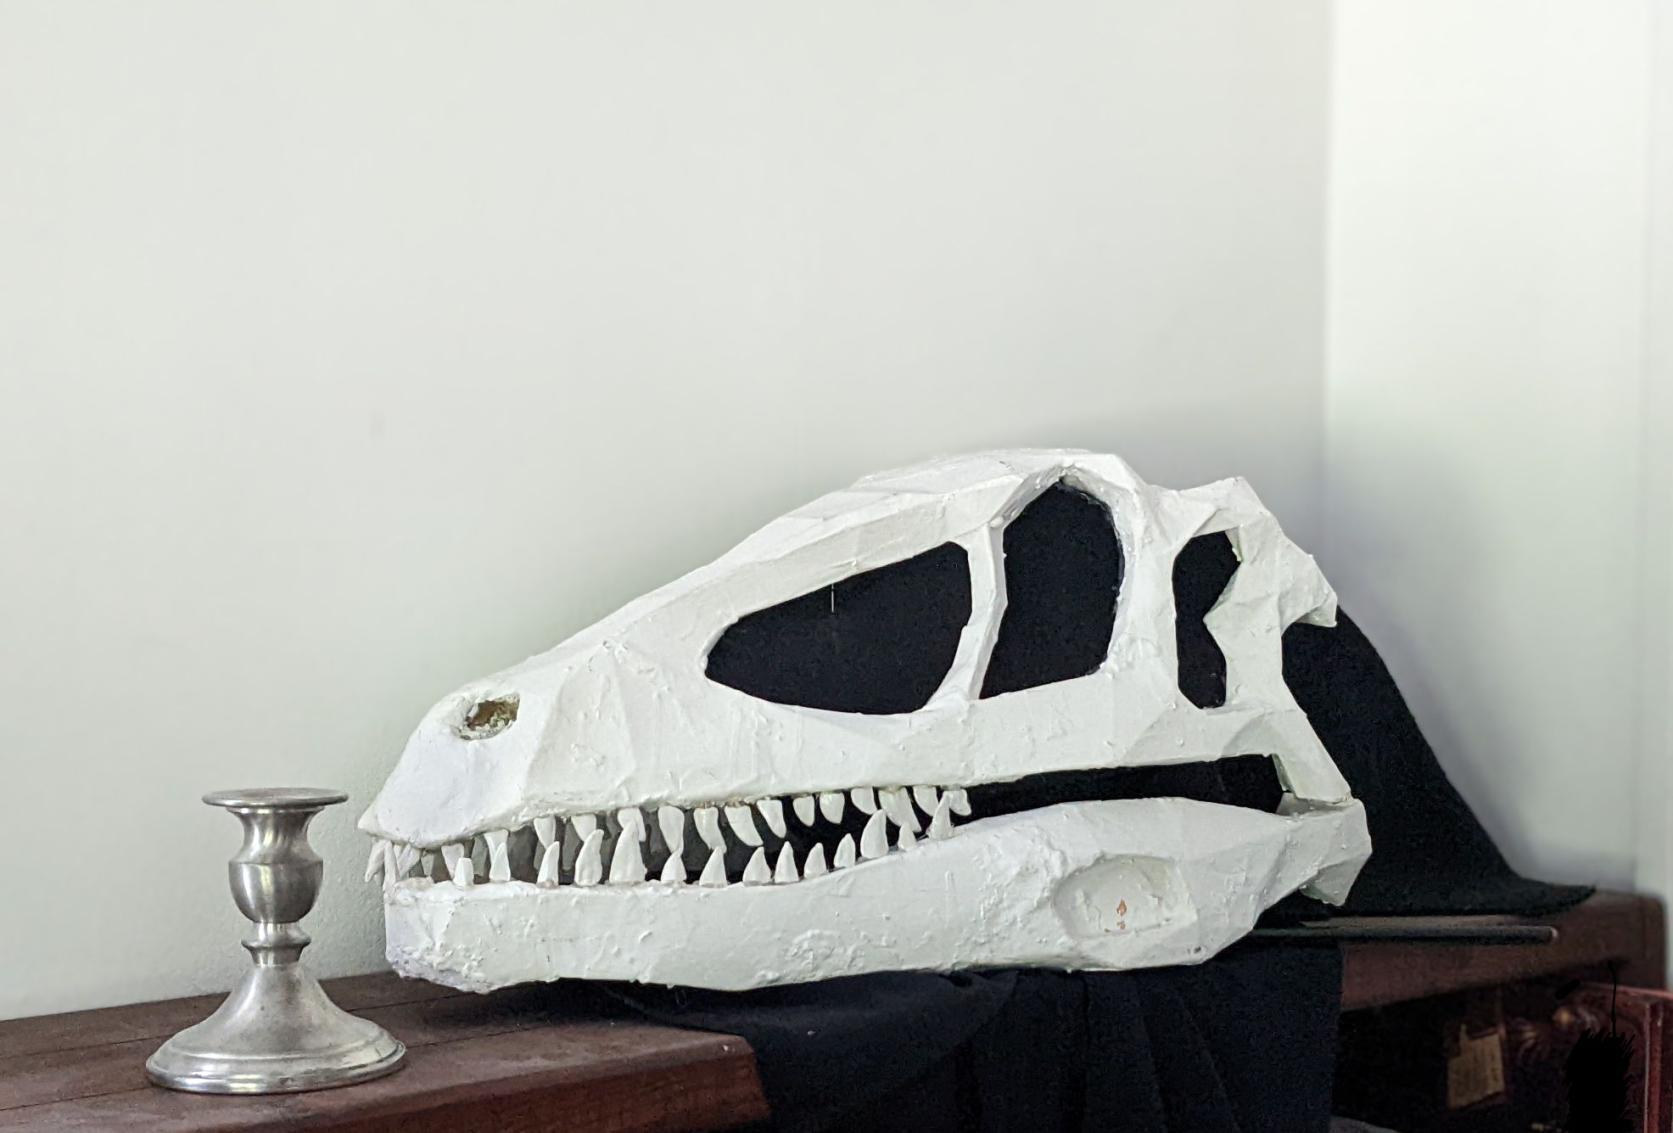
This costume head, based on Deinonychus antirrhopus, was my 2017 Halloween costume. It still receives some wear, but it’s somewhat unwieldy, for reasons I’ll get into later.
This is based on a 3d scan of a dinosaur skull, which was then made symmetrical using the 3d modeling software Blender. To turn it into a papercraft model, I used a Blender export script written for Blender 2.6. It worked in Blender 2.7; I have no idea if it will work in modern Blender.
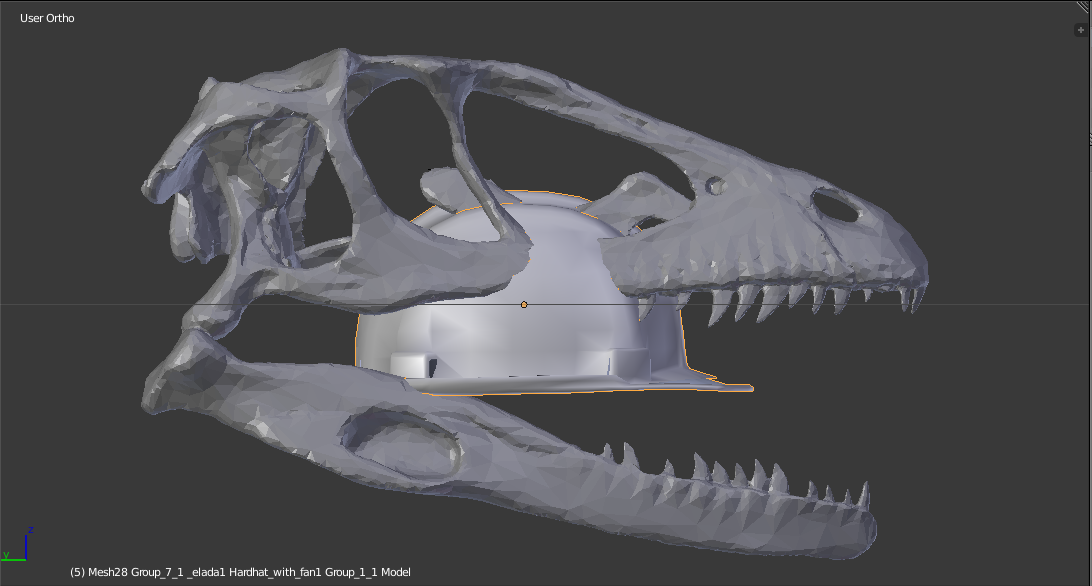
To hold the deinonychus’ head onto mine, I used a construction helmet.
This Blender screenshot shows the hard hat in the process of being inserted into the skull. To support the hat, I needed to widen the skull somewhat.
The modeling process involved significantly simplifying the model, making it practically lowpoly. Among other revisions, I removed the teeth and closed the nose.
After issues with the construction of a previous year’s Lewis head, I decided to print the model on a single sheet of paper. This allowed me to avoid the awkward step of mating different individual sheets of paper, and skip straight to cutting and folding the papercraft.
The paper model was quite floppy, so for internal strength I worked in several sections of wire to provide reinforcement. I left several triangles in the model open.
Most spray foams use a flammable gas as a propellant, and a toxic solvent, so I did the foam portion of this project in the summer, with my kitchen windows wide open and a fan blowing. The head took a week to stop smelling.
Several areas of the skull were deformed by the expansion of the foam, so I had to make revisions to the skull using knives, and then glue paper on over the exposed foam.
Painting was a simple job with several coats of matte white spraypaint. I filled the eyeholes with stretchy black cloth, and added some dollar-store lights
Construction
To aid in your effort, see the following photo logs:
Tape and glue. I used masking tape and medical tape to hold the edges in place while glue dried for a more-permanent solution. Wood glue is best.
Insert wires.
Insert spray foam, ventilate, and wait for curing.
Manufacture teeth.
Form the teeth around toothpicks.
Lay the toothpicks out on a strip of tape, and then lay another strip of tape atop it, sticky to sticky.
Hang your teeth up to dry
Paint the teeth. I used a coat of white spraypaint, and then a couple coats of gloss white.
Cut up your construction helmet, removing the crown of the hat but leaving the ring around the edge and the harness that secures it to the head. Drill holes in the rim, thread zip ties through it.
Remove spray foam drippings.
Apply wood filler to smooth things out, if so desired.
Glue on teeth. Poke hole through paper of jaw with a pin or thumbtack, then insert the toothpick of the tooth. Pull it out, fill the hole with hot glue, shove the toothpick back in.
Use hot glue and sewing pins to add the black fabric to the head, making sure that you can see out of it. There are four pieces of fabric:
the lower jaw liner
the face shield
the mantle
the two tendons in the jowls
Optionally, sink another eye hook into the front of the jaw, and one in the end of your dowel. Use the dowel for puppeting the jaw.
Enjoy. Only bite consenting partners.
Future revisions
There are two goals that a future revision of this head might involve: making it smaller, and making the jaw move without direct puppetry. I tried to use a Bowden tube design for indirect puppetry, but couldn’t get a good setup going.